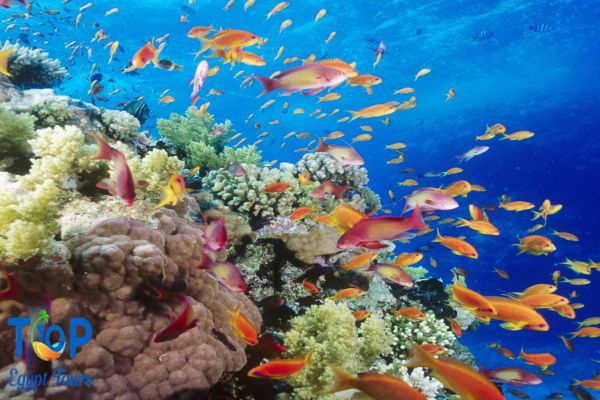
Top Ten Egypt, your gateway to travel experiences in the land of Egypt, As a travel enthusiast, you may find yourself drawn to the allure of the Red Sea, a haven for underwater explorers. In this article, we will delve into the fascinating world of underwater photography and discuss strategies for overcoming the unique challenge of low visibility in the Red Sea.
In this article, we’ll explore some tips and techniques for overcoming these challenges and capturing stunning images, Top Ten Egypt is your gateway to travel experiences in the land of Egypt
1. Understand the Causes of Low Visibility
Before we dive into tips and techniques, it’s essential to understand the causes of low visibility in the Red Sea. Low visibility can be caused by several factors, including:
– Plankton blooms: The Red Sea is home to a variety of planktonic organisms, which can cause blooms that reduce visibility. These blooms are most common during the summer months.
– Thermoclines: The Red Sea has a distinct thermocline, which is a layer of cold water that separates the surface water from the deeper water. This layer can cause changes in visibility, as it can trap nutrients and plankton, leading to reduced visibility.
– Currents: Strong currents can stir up sediment and debris, reducing visibility. This is particularly true in areas with high tidal flows or near shorelines.
– Weather: Heavy rainfall or strong winds can also reduce visibility by stirring up sediment and debris.
2. Adjust Your Camera Settings
When dealing with low visibility, it’s essential to adjust your camera settings to compensate for the reduced light and contrast. Here are some tips for adjusting your camera settings:
– Increase ISO: Increasing your ISO will allow you to shoot at faster shutter speeds, which is essential when dealing with low light conditions. However, be careful not to increase your ISO too much, as this can lead to increased noise and graininess in your images.
– Use a wider aperture: A wider aperture (smaller f-stop number) will allow more light into your camera, which is essential when dealing with low light conditions. This will also help you achieve a shallower depth of field, which can help you isolate your subject from the background.
– Use a slower shutter speed: When dealing with low light conditions, you may need to use a slower shutter speed to achieve proper exposure. However, be careful not to use a shutter speed that’s too slow, as this can lead to blurry images due to camera shake or subject movement.
– Use manual focus: In low visibility conditions, it can be challenging to achieve accurate autofocus. Switching to manual focus will give you more control over your focus point and help you achieve sharper images.
3. Use Backscatter Reduction Techniques
Backscatter is a common problem when shooting in low visibility conditions, as particulate matter in the water can reflect light back into your lens, causing unwanted specks and spots in your images. Here are some tips for reducing backscatter:
– Use a snoot or diffuser: A snoot is a device that attaches to your strobe and directs the light onto your subject while preventing it from spreading out too widely. This can help reduce backscatter by minimizing the amount of light that’s reflected back into your lens. A diffuser is another device that attaches to your strobe and helps spread out the light more evenly, which can also help reduce backscatter by minimizing hot spots and shadows.
– Use a red filter: A red filter can help reduce backscatter by absorbing green and blue light (which are more prone to causing backscatter) while allowing more red light through (which is less prone to causing backscatter). This can help you achieve clearer images with less unwanted specks and spots.
– Use proper strobe placement: Proper strobe placement is essential when shooting in low visibility conditions. Try placing your strobe closer to your subject and aiming it directly at them rather than using wide-angle strobes or diffusers that spread out too widely. This will help minimize backscatter by reducing the amount of particulate matter that’s reflected back into your lens.
4. Focus on Composition and Creativity
When dealing with low visibility conditions, it’s essential to focus on composition and creativity rather than trying to capture every detail of your subject. Here are some tips for achieving creative shots in low-visibility conditions:
– Look for interesting shapes and textures: When visibility is low, it’s essential to focus on shapes and textures rather than trying to capture every detail of your subject. Look for interesting patterns and shapes in the sand or coral formations, or try capturing the texture of marine life like sea anemones or nudibranchs.
– Use negative space: Negative space refers to the empty space around your subject in an image. In low visibility conditions, negative space can help create a sense of depth and atmosphere in your images by allowing the viewer’s eye to wander around the frame rather than focusing solely on the subject itself.
– Experiment with different angles and perspectives: When dealing with low visibility conditions, it’s essential to experiment with different angles and perspectives to find new ways of capturing your subject. Try shooting from below or above instead of straight on, or try using wide-angle lenses or fisheye lenses to create unique perspectives that capture more of the environment around your subject.
– Look for unique lighting conditions: Low visibility conditions can also create unique lighting conditions that can add drama and atmosphere to your images. Look for areas with strong currents or tidal flows that create interesting patterns of light and shadow on the seafloor or try shooting during sunrise or sunset when the light is softer and more diffused.
Top Ten Egypt Tours, is your gateway to travel experiences in the land of Egypt and it invites you to dive into the Red Sea’s wonders and create memories that will last a lifetime. Happy exploring!


Comment (0)